10 Common Game Controller Issues and How to Fix Them
There’s nothing more frustrating than being in the middle of a game and your controller starts acting up. Maybe your character moves on its own, buttons stop responding, or there’s a delay between pressing a button and seeing it on screen. Controllers are made to last, but over time, they can develop problems.
No matter which controller you are using a PS5 DualSense, Xbox controller, Nintendo Switch Pro, or a PC gamepad, issues like stick drift, dead zones, input lag, battery troubles, or unresponsive buttons are common.
The good news is that most of these problems can be diagnosed and fixed at home without buying a new controller.
In this guide, let’s discuss the 10 most common controller issues, what causes them, and simple solutions you can try yourself.
By the end, you’ll understand why your controller misbehaves and how to avoid these issues.
Why Game Controllers Face Common Problems
Even the most advanced controllers can be susceptible to the ravages of time. Understanding the reasons behind these problems can help you to prevent and resolve them more quickly. Controllers contain large amounts of moving parts, sensors, and electronics. Combined with regular use, the environment, and software updates, some type of issue is almost guaranteed to occur.
Do All Controllers Have Problems?
Yes, but the nature and frequency of problems differ from brand to brand and model to model:
- DualSense: High build quality, but it has been reported that the analog sticks drift, and the adaptive triggers tend to glitch.
- Xbox Series X/S: The Xbox Series X/S is very durable, but the triggers, bumpers, and batteries can wear out with heavy use.
- Nintendo Switch Joy-Cons: Nintendo’s controllers were plagued by an infamous stick drift problem, particularly when used for extended periods.
- PC Gamepads: Whether an official or generic PC gamepad, the buttons can easily start to wear down, the connection can be faulty, or they may not have been calibrated correctly.
- Third-party or budget controllers tend to suffer more from stick drift, sticky buttons, or unresponsive inputs (lower quality components).
In short, there is no controller that is totally immune, but higher-end models typically have longer-lasting equipment and have better repair and firmware support.
1. Stick Drift (Joystick Moves on Its Own)
Stick drift is when your analog stick moves or registers input even when pushing down on it. You may see your character wandering around on their own, or the camera panning around slowly. This is widespread in PS5 DualSense, Xbox Series X/S controllers, Nintendo Switch Joy-Cons, and some PC gamepads.
Why Does Stick Drift Happen?
Stick drift is typically a result of:
- Dust or dirt is accumulating internally in the analog stick.
- The stick has a sensor that can wear out.
- Updated or heavy use calibration problems.
- Sweat or moisture getting into the stick and affecting the accuracy.
How to Test for Stick Drift
The simplest way would be to use an online gamepad tester. Connect your controller and see if the stick moves without you. Most consoles also have calibration tools where you can easily see where drift is occurring.
How to Fix Stick Drift
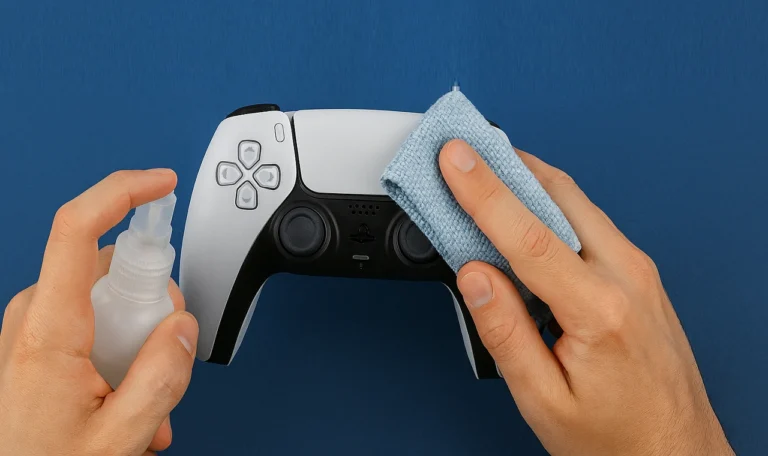
Clean the analog sticks.
- Turn off the controller.
- Dusting should be done with a microfiber cloth and compressed air.
- Use a cotton bud dipped in isopropyl spirit to clean the area around the base of the stick.
Recalibrate the controller
Windows: Game Controller Settings – Properties – Calibrate
Nintendo Switch – Settings – Controllers – Calibrate Control Sticks
PlayStation/Xbox: Reboot controller (set by console or reset button)
Update firmware
Both Xbox and PS5 controllers get firmware updates, which add accuracy improvements.
On PC, it is important to keep your drivers updated.
Consider replacement parts
If remedies are not working, the analog stick module may need to be replaced.
Drift is usually hardware-related, and DIY kits are available on the web.
2. Dead Zones (Unresponsive Stick Movements)
A dead zone is the small area around the center of your analog stick where the smallest movement does not make any noticeable movement on the screen. You try to make your character move, but nothing happens until you push it more. While all controllers have a very small dead zone as a design element (to avoid unwanted input), large or inconsistent dead zones can destroy accuracy, and that’s much more problematic in shooting, racing, or competitive games.
Causes of Dead Zones
Dead zones tend to form as a result of:
Stick wear – After a while, the sensors inside the analog stick (potential meters) lose sensitivity.
Bad calibration – An incorrectly set controller may fail to register smaller movements.
Game settings – Some games have their own dead zone threshold setting, which, in this case, makes the problem worse.
Dust or dirt – Around the stick base, debris hinders fine operation.
How to Test for Dead Zones
An easy way to test dead zones is to plug your controller into an online tester. Gently push the analog stick in and out in all directions, and see at what point the system begins to register motion. If your controller ignores small movements close to the center, you have a significant dead zone.
How to Minimize or Eradicate Dead Zones
Adjust in-game settings
Many PC and console games allow you to adjust dead zone sensitivity from the controller settings.
Keep bringing the value down until small movements are noticeable, but don’t go too low (which can increase the amount of drift).
Recalibrate the controller
On Windows, you can do the following: Control Panel – Devices and Printers – Controller Settings – Calibrate.
On Nintendo Switch: System Settings – Controllers and Sensors – Calibrate Control Sticks
How to Reset and Re-Calibrate Your Controller on Xbox/PS5: In system settings, reset and recalibrate your controller.
Clean the analog stick.
Dust accumulated can make it unresponsive. Use compressed air or alcohol wipes to clean the stick base gently.
If calibration and cleaning do not get rid of the problem, it could be hardware related. Replacement kits are now available for PS5, Xbox, and Switch controllers.
3. Input Lag or Delay (Slow Controller Response)
Controller input lag is the short delay that happens when your controller sends a command but the game responds a moment later. A fraction of a second is all it takes to make games feel slow and unplayable. Imagine in a first-person shooter, when you press “shoot,” your character fires just before, or in a racing game where you try to take a turn, but the turn is too late. Input lag is one of the most frustrating issues that gamers of all levels, and competitive gamers in particular, can encounter on their controllers.
Symptoms of Input Lag
- Character movements feel delayed (sluggish).
- Buttons don’t register as quickly.
- Input delay is increased during online play or when using Bluetooth.
- High-speed games like FPS, fighting games, or racing games simply won’t work.
Causes of Input Lag
There are many reasons why input lag can occur:
Bluetooth interference – multiple devices (headphones, speakers, wifi) fighting over signals.
Low battery – Weak power slows down response.
Slow polling rate – Some controllers have a slower Hz response (125Hz vs 1000Hz).
Outdated firmware/drivers – There’s also the question of outdated software causing latency.
Refresh rate – Sometimes the problem is not with the controller, but the refresh rate of the display.
How to Test Input Lag
Use controller testing tools like gamepad tester to test input response time.
A number of PC benchmarking tools and some games also report input latency in milliseconds.
How to Fix Input Lag
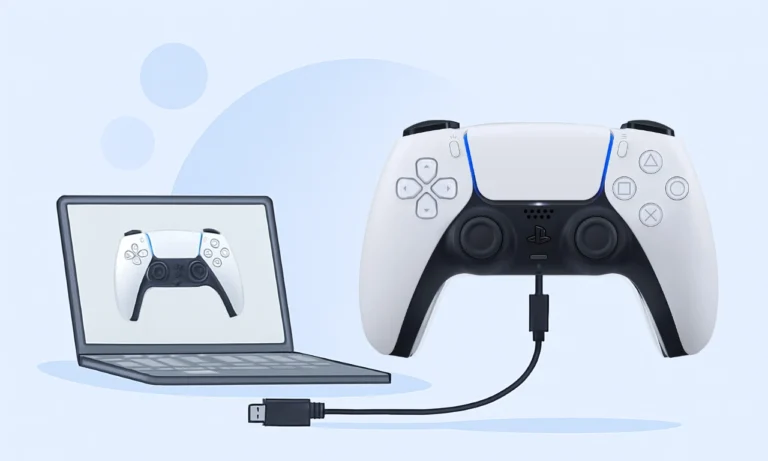
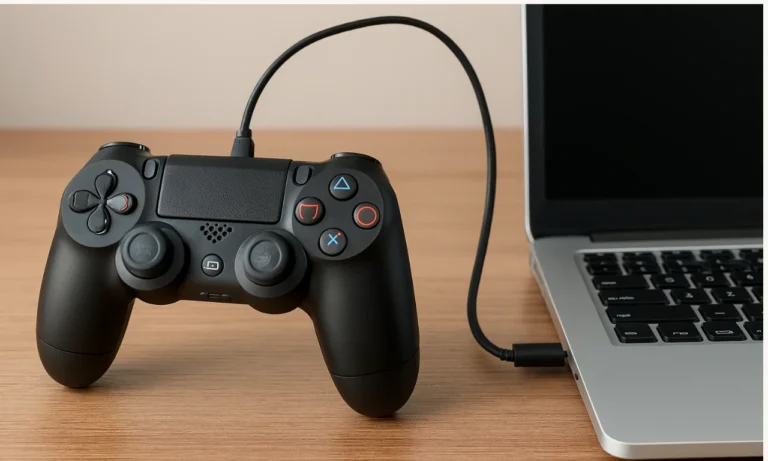
Switch to wired mode
Using a USB Cable – Use a USB cable instead of wireless connection will significantly reduce the lag.
Best for competitive or fast-paced gaming.
Fully charge your controller.
Latency is increased if the battery power is low. Testing input sensitivity when fully charged.
Limit wireless interference.
Move away from other Bluetooth devices.
The controller should be kept near the console/PC.
Turn off wireless devices that are not being used.
Update firmware and drivers.
For the PS5 DualSense, you need to use PlayStation software updates.
Xbox controller – update using the Xbox Accessories app.
On PC, look under Windows Device Manager, or manufacturer’s drivers.
Increase polling rate (PC users)
Some advanced drivers or software can increase the polling rate from 125Hz to 500Hz or 1000Hz for faster reaction.
Check your display settings
Enable Game Mode on your LCD/LED to reduce latency in the display.
Monitor that has a low response time (1ms-5ms)
4. Unresponsive Buttons (When Inputs Do Not Register)
A sticky button means when you press a button on your controller (A, B, X, Y, triggers), and nothing happens on screen. And you have to press the buttons over and over or with extra force. This problem can be very frustrating, particularly in shooting and fighting games where timing is everything.
Common Symptoms of Unresponsive Buttons
- The action is not produced by pressing a button.
- Buttons sometimes register twice or erratically.
- Controller works fine otherwise (sticks and triggers work, but some buttons don’t)
Reasons Why Some Buttons Are Not Responsive
- Dust or debris accumulation: Dirt stuck beneath the button prevents the button from making contact
- Worn-out button pads: Over time, the conductive pads under the buttons become unresponsive.
- Software or driver issues: In some cases, the button is functional physically, but the system fails to register input due to outdated software drivers, firmware versions, or game-specific configurations.
- Accidental remapping: Sometimes a button has been remapped in the game or system settings, often without the player noticing. This results in unexpected actions during gameplay, making controls feel unresponsive or confusing.
How to Test for Unresponsive Buttons
- Use an online tester to see which buttons you can get to work.
- On consoles, go into the controller settings and press each button to see if inputs are registering.
- For PC, use software such as Controller Test or the Steam controller configuration utility.
How to Get Responsive Buttons to Work
Clean the buttons. First power off the controller and remove the dust with blast of compressed air. Then dip a microfiber cloth or alcohol swab in the wash water and rub around the buttons.
Check for button remapping
On consoles: Check system and game settings to make sure default mapping has been applied.
On PC: Check Steam or the game’s controller settings.
Update firmware and drivers
Conflicts with other software may cause buttons not to register correctly.
Install official console updates or updates to PC drivers.
Replace button pads
If cleaning and firmware updates are not sufficient, the metal pads under the buttons may be worn.
Parts of the PS5 DualSense, Xbox Series X/S, and Switch Pro controllers are now available in markets.
5. Sticky or Stuck Buttons (Buttons Not Releasing Properly)
Sticky buttons – These are buttons that are difficult to press, slow, or do not return to their original shape after being pressed. An action button can stay pressed until you consciously let go of it. These issues can affect gameplay negatively and can result in accidental input, especially in games that require precise input.
Why Buttons Become Sticky
- Dirt, dust, and debris: Tiny particles can get stuck under buttons, causing them not to move smoothly.
- Sweat or moisture: Sweat or accidental spills can cause stickiness in the buttons after a long gaming session.
- Wear and tear: The springs and pads under buttons become less elastic over time.
- Spills or sticky liquids: Spills of soda, juice, or food can cause buttons to stick permanently to the fabric if not cleaned up immediately.
How to Test for the Stickiness of Buttons
- Now push each button several times and see if you feel resistance.
- Test the button at online controller tester to ensure great, stable input from the button.
- Compare against another controller to identify abnormal resistance or slow response.
How to Fix
Clean around the buttons with a damp microfiber cloth touched with isopropyl alcohol.
Press the buttons while cleaning to loosen debris.
Just blow compressed air around the buttons to remove dirt inside them.
Deep cleaning (if necessary)
Take off the button caps and carefully clean off the underlying contacts.
Preventive measures
Wash your hands before gaming.
Don’t eat or drink around your controller.
Use covers or silicone button caps.
Disassembly of the controller should be done only by someone familiar with electronics.
6. Connectivity Issues (Controller Disconnects or Fails to Pair)
Connectivity issues: If your controller is unable to pair, keeps disconnecting, or loses connection during gameplay, it’s a sign of a connectivity issue. This is particularly frustrating in a wireless gaming environment on PS5, Xbox, Switch, or PC, where dropping unexpectedly can lose matches or streaming sessions.
Common Connectivity Issue Symptoms
- The controller cannot be paired with a console or PC.
- Random disconnection of the controller during the game.
- Input is not continuous or delayed because of dropped connections.
- USB cable connections do not detect controller input.
Known Problems That Can Interfere with Connectivity
- Bluetooth interference: Several wireless devices can interfere with the signals.
- Outdated firmware or drivers: Older software may contain bugs that can cause connectivity issues.
- Damaged USB cable or port: Wired connections can fail if the USB cable is damaged or the USB port is worn.
- Battery problems: Weak batteries in wireless controllers can lead to disconnections.
- Distance from console or PC: Controllers can lose connection if they are too far away from the receiver.
How to Test Connectivity
On consoles, go to controller settings to see if the device is paired correctly.
On PC, check Devices and Printers or use a controller testing tool to verify signal stability.
Wired and Wireless testing of the controller to localize the problem
How to Resolve Connectivity Problems
Reset the controller and pair it again. Press the reset button on the controller (small hole on most models).
Reconnect via USB or Bluetooth following console instructions
Update firmware and drivers
Update PS5 DualSense via system software.
Update Xbox via the Xbox Accessories app.
PC: Update drivers by using Windows Device Manager or the manufacturer’s website.
Fix damaged cables or use different USB ports; sometimes an old or broken cable creates unstable wired connections.
Minimize wireless interference
Move away from other Bluetooth devices such as headphones, phones, or Wi-Fi routers. And maintain the controller within a proper distance of the console or PC receiver.
Check battery health
Fully charge your controller or replace the battery if it is old or degraded.
7. Battery & Charging Problems (Controller Won’t Charge or Drains Too Fast)
Battery issues are when a controller fails to charge, charges really slowly, or fails to retain charge. For wireless controllers such as PS DualSense, Xbox Series X/S, and Nintendo Switch Pro, this can completely block gameplay or cause frequent interruptions.
Common Symptoms
- The controller does not charge while connected.
- The battery depletes too fast, even with little use.
- The controller randomly shuts off due to low power.
- Indicating lights on the charger don’t work as expected.
Common Electrical Malfunctions That Cause Battery and Charging Issues
Damaged charger: If a charger is worn or damaged, it will not charge properly.
Battery degradation: Rechargeable batteries lose capacity with repeated recharging.
Overcharging or overheating: It can harm the battery and shorten its lifespan.
Controller port issues: If dirt, dust, or physical damage has occurred to the USB port, charging cannot be done.
How to Check for Battery Issues
Use a different charging cable or adapter.
Plug the controller into a different console or PC port and charge it.
If a controller tester tool is available, use it to check the battery status.
How to Solve Battery & Charging Issues
Use a different adapter or cable.
Try several USB cables, ideally the one that is shipped with the controller.
Confirm that the adapter is powerful enough (refer to console/wall charger specifications)
Reset the controller
Some charging failures are transient and will be eliminated by a simple controller reset.
Firmware updates can correct battery calibration and false drain reports.
If the battery is no longer able to hold a charge, replace it with a compatible or OEM rechargeable battery.
Reduce the Risk of Future Battery Problems
Avoid overcharging.
Keep controllers dry and at normal temperature.
Charge before the battery runs completely flat to increase lifespan.
8. Trigger & Bumper Malfunctions
Triggers and bumpers (L2/R2, L1/R1 on PlayStation, LT/RT, LB/RB on Xbox) are important for racing, shooting, and action games. When these buttons cannot register correctly, double-click, get stuck, or do not work at all, they don’t function properly. This can be very frustrating in precision gameplay, especially in competitive.
Common Symptoms
- Triggers feel loose or mushy.
- Buttons double register on one press.
- Inputs do not register occasionally.
- Slow or sticky shoulder buttons on the controller.
Causes of Trigger & Bumper Failure
Wear and tear: Springs and contact pads wear out under heavy use.
Dust, dirt, or debris: There can be accumulated grime that hinders the button from moving as it should.
Moisture or liquid exposure: Button sensors can be impacted if exposed to moisture or liquids.
Software / Calibration Problems: In some cases, software bugs misreport button presses.
How to Test Triggers or Bumpers
Use a software/tool to see how the buttons react.
Console settings for live input detection.
Press buttons several times to determine if issues are systematic
How to Repair Trigger or Bumper Fails
Power off the controller and cleaning the area around triggers and bumpers can be done using compressed air and alcohol wipes.
Check for firmware updates
PS5: Fix DualSense through system software.
Xbox: Update from Xbox Accessories app.
Recalibrate (if available). Some controllers can be used to calibrate the triggers to correct for low or high sensitivity.
Fix or replace mechanical parts
If cleaning and repairs do not work, then the springs or inner pads may need to be replaced. A replacement kit for common controllers is available for home DIY; however, caution should be used.
Preventive tips
Do not apply too much force to triggers and bumpers.
Clean and dry controllers (no moisture).
9. Calibration Errors (Controller Feels “Off”)
Calibration errors occur when your controller’s inputs do not match the expected output. For instance, the stick might move the tiniest bit more in one direction, or the button presses might be inconsistent. This can result in an unresponsive movement in play.
Common Symptoms
- Character movement or camera angles are not perpendicular to each other.
- Sticks or triggers do not work as they should.
- Games show very slight unintended movement even when the stick is centered.
- Buttons can be registered incorrectly in some games.
Sources of Calibration Error
Controller wear and tear: Analog sensors can be out of alignment over time.
Software problems: Outdated software can lead to input misunderstanding for the stick.
Recent firmware updates: Sometimes a firmware update resets or misconfigures calibration.
Environment: Sensors are slightly influenced by extreme temperatures and magnetic interference.
How to Correct Calibration Errors
Recalibrate the controller
Windows PC: Control Panel – Devices and Printers – Controller settings – Calibrate.
Switch: System Settings – Controllers and Sensors – Calibrate Control Sticks.
Update firmware and drivers
Make use of the latest updates through Console or PC software.
Restore the controller to factory default. To perform a reset controller using a reset button or system reset option.
Clean the analog stick module with compressed air or alcohol swabs.
Replace analog stick drives.
10. Firmware & Driver Issues (Outdated Software Causing Controller Problems)
Firmware and drivers are the software that enable your controller to communicate properly with your console or PC. Corrupted firmware or outdated drivers can lead to a multitude of issues, including stick drift, input lag, unresponsive buttons, and connectivity problems. Even a brand new controller may act up if the software it runs is out of date.
Common Symptoms
- Buttons or sticks that don’t work as expected.
- Controller disconnects itself periodically.
- Adaptive triggers (PS5) or vibration no longer work.
- Update introduces input lag or calibration errors
Reasons for Firmware & Driver Problems
- Firmware incompatibilities: Console and PC will fail to recognize the controller properly if the latest updates have not been installed.
- Corrupted drivers: Drivers that are not installed properly or a glitch within the system can misinterpret inputs.
- Third-party program clashes: Some programs or mods clash with the controller drivers.
- Note: If the controller is functional on one machine and not on another, it is probably a driver or firmware problem.
How to Solve Problems in the Firmware & Driver
- PlayStation console: Update your PlayStation console.
- Xbox Series X/S: Update in the Xbox Accessories app.
- Nintendo Switch Pro: Automatically receives updates when connected to the system.
- Update PC drivers. If an updated driver does not resolve problems, reinstall the driver.
- Sometimes the PC OS or console itself needs to be updated in order to support controllers.
- Avoid third-party conflicts by turning off unnecessary software that could interfere with input devices
- Use only certified adapters or controllers for PCs
- Restore controller firmware (if it can be restored). Some controllers have a factory reset function that can resolve recurring glitches.
When to Repair vs. Replace a Controller
Not all controller problems are worth spending money on a new one. Here’s how to decide:
Repairable Issues
- Stick drift that gets influenced by cleaning or recalibration
- Sticky or unresponsive buttons that improve with cleaning
- Firmware or driver problems
- Battery faults that can be solved by changing the rechargeable cell
When Replacement Is a Wise Choice
- Continuously faulty hardware (broken analog stick, trigger springs, or button pads)
- Repeated connection or calibration issues after troubleshooting
- The repair cost is more than the price of a new controller
- Limited parts and limited support for third-party controllers
Pro Tip: Budget controllers might be cheaper to replace, but high-end controllers like PS5 DualSense or Xbox Elite might be worth repairing.
Final Thoughts
While game controllers are an essential part of the gaming experience, they are susceptible to wear and software glitches.
By following the tips mentioned in this blog, you can extend the life of your controller. If issues continue, you can repair quality controllers or replace budget controllers for smooth gameplay.
Finally, there are tools, such as gamepadtester.co, that can be invaluable in testing and diagnosing the performance of your controller. With proactive measures, you can savor precision, reliability, and uninterrupted gaming experiences for years to come.